Sunday, November 29, 2009

Update w/lots o' pics

So, we've got all four sides stripped of siding down to framing.  The original siding - vertical tongue and groove - has been carefully removed, preserved, cataloged and set aside for re-installation later.  Some of the sidewalls are re-sheathed with plywood, which is a major improvement in the strength and rigidity of the building.  The mudroom roof, which we found to be in seriously deteriorated condition has been rebuilt to match its original configuration, except we added some additional rafters.  It's as-built configuration was 2x4 rafters on 48" centers!  I couldn't bring myself to duplicate that, even though it clearly stood for many years and even withstood the occasional hurricane.  Being cautious, however, we rebuilt it using 2x6 rafters, but we cut the rafter tails to match the appearance of the original 2x4's and we installed them on 24" centers.

The window jambs and casings are all removed and set aside for restoration.  That will be my project in the shop after we get the jacking done.  And speaking of jacking....we're about to get that started.  Last week the crew - Jason, Johnny and myself - set cribbing and shifted the weight of the building off of the original pilings and started removing them, as the pilings are in the same spots we intend to set footers and build new brick piers.  On Wednesday we are going to pour about three and a half yards of concrete in 27 footing forms, eleven of which are under the house.  Fun.

We'll give the footers a few days to set up before we start jacking on them.   Probably Monday of the following week we'll start the actual jacking.  I expect to bring the house up about 30" and I don't think it will take more than a couple of days. 

Here are some pictures of progress to date.


Front stripped and ready for sheathing


North side stripped to original framing


Termites!!!


Mudroom roof     Pre-restoration


North side stripped to original siding - a hint of what the final look will be....

Monday, November 16, 2009

Moisture - It's Baaaaack

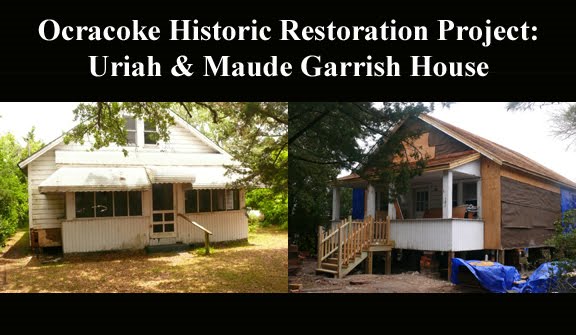
We were lucky.  The storm-driven high tide that caused so much trouble up the beach did relatively little damage in Ocracoke and was only an inconvenience here on the jobsite.  We're back at it, as of Monday morning, stripping siding on the rear gable end.

All this water, though, returns us to the discussion about moisture and insulation.  The point I made last time I posted on this topic was that most moisture problems in Ocracoke homes are not the result of  mis-placed insulation or moisture barriers.  This is because the physical process which causes dew (condensation) rarely takes place inside our houses, the way it does in colder climates.

That's not to say we don't have challenging moisture conditions - throw a stick here and you'll hit somebody's house that has mildew, mold, termites or rot in it.  But to reiterate - it's not because of insulation or air barriers.....so what is the culprit?  Our biggest problem is exterior source moisture getting past the protective siding and then not quickly drying out. In other words, our houses are getting wet and staying wet.

There are several causes and some are brought to us by mother nature, others by poor construction and poor maintenance.  Mother nature's contributions are rain, wet ground, high humidity and (yes) condensation.  Every dewy morning and evening - and we get a lot of those - temperature change squeezes moisture out of the humid air and deposits it onto cool surfaces, like your car, your deck, your bicycle and the exterior surfaces of your house.  This is practically a constant and, in my opinion, the greatest source of damage-causing moisture in Ocracoke homes.  Add in wind-driven rain and ground water, and there is enough moisture around to rot a co'cola bottle.

So this is where good construction and good maintenance have to happen.  First, moisture must simply be kept from penetrating into the house by every reasonable means.  Second, roofing, siding, flashing, paint, caulking, etc must be maintained so that it can continue to do its job,  Third, where wood does get wet, it must be provided with as much opportunity as possible to dry - that means providing ways for water to drain away, allowing airflow around it and letting the sun shine on it.

The Following Is A Rant
And let me say right here, caulking should be the last, not the first line of defense.  I've seen so much Geocel gooped around windows and doors in lieu of good carpentry that I've begun to think that every carpenter should be allotted a fixed amount of the stuff at the beginning of the year. Use it up on one door if you like, but that's it until next January 1st.  I replaced a door earlier this year (I won't say where) that had so much Geocel stuck to it that no piece of jamb or casing came off in any chunk bigger than a half a sandwich.  Obviously the intent was to prevent moisture from getting in, but why do you suppose I was replacing the door?  Because it was rotted out, that's why. So, if all that caulking didn't work; what would have?  Proper flashing, end grain sealing, holding trim up from the deck, proper flashing (did I say that already) and then finally smart caulking and regular maintenance.

I could go on.  But the point is - designers and carpenters must specify materials carefully, design to allow drying and build to prevent wetting.  We are the professionals and must understand the mechanics of air movement, condensation and energy efficiency.  We can't assume that a manufactured item is install-ready and we have to be willing to take the extra time to prep and back-prime materials before installation.  Homeowners must take responsibility to regularly check their homes for failing paint, caulk, flashing, roofing siding, etc, call a (licensed) contractor to get repairs done and be willing to pay well for work done well.

How does all of this apply to historic restoration?  In new construction you only have to do it right - but in restoration, every step involves trade offs between the demands of good building practice and the often competing demands of preservation.  Sometimes the decisions are easy and sometimes not, but it's always a challenge.

Monday, November 9, 2009

A Mystery Unearthed and Swiftly Solved

There seems to be no end to the discovery phase....As we got the south side stripped of the third and second layers of siding, we began to notice a correlation between rotted top plate and two sections of replaced siding.  On a hunch, I dug into the soil and discovered a footing at each location, getting in return a very satisfying "aha" as it all came together:  There were once two chimneys on that side - one at the living room and one at the kitchen.  Both had been installed in such a way as to allow water to penetrate along the joint between the chimney and the roof (ie no cricket) and thus the two worst sections of rotted top plate!

In addition, we had begun to suspect that the existing chimney wasn't original, because of its location and that its enclosure sat on top of a newer layer of plywood subfloor.  So now we're sure it isn't original and we plan to eliminate it, as it is an obstruction in the second floor space.  We would like to restore one or both of the original chimneys, but we don't know if the funds will allow it at this time.  Funds being not so endless as the discoveries.


This is Carol tirelessly but carefully doing demolition in the front bedroom. 


This is the aforementioned south side, stripped of its two outer layers of siding and showing two locations where chimneys once existed.  The nearer is covered in unpainted wood, the farther (living room) is covered with wood siding, painted blue.  Also note the two hidden window openings (we like to call that "fenestration") that had been likewise covered over with blue painted siding.  Incidentally, that "siding" had once been inside as finish wall surface, and apparently was removed and, in true Ocracoke fashion, re-used.
 

Oh, and this is the rotted top plate, which has now been cut out and replaced with new material matching the dimensions of and lap-jointed into the existing. 

As to the ongoing discussion on insulation, moisture, condensation, dew point, etc... it'll have to wait 'til next post.  Also, I have information about a very effective environmentally friendly insecticide/fungicide which I've just ordered and will use throughout this structure.  I'm hoping to post again before the week is over.  Adieu.

Sunday, November 1, 2009

Insulation...is it good or bad for an old house????

I ran into Paula Schramel the other day and she raised some questions about insulation in old buildings.  It happens that the questions she asked were on my mind relative to this building and also have been the subject of several ongoing discussions I have been having with some other builders here in Ocracoke.  Because I find it interesting and because it is so critical to historic restoration, I thought I'd share some of this discussion in my next couple of blog entries.

Thermal efficiency in old buildings has been one of the issues that restoration professionals have grappled with for years without ever really finding a magic bullet solution.  In fact, the debate is not just confined to restoration contracting, but includes the entire construction world, as it is a functional issue which is affected by practically every other decision made in designing and constructing buildings.  It happens that those problems are magnified when you factor in an old building.

I've heard many carpenters say that building a house "too tight" will result in moisture problems and ultimately cause rotting in the structure etc.  Well, there is plenty of evidence to support that conclusion, but a closer look at the evidence would likely suggest other problems than a house with too much insulation or walls that are unable to "breathe".  There are really two ways a building is going to be wet - either by exterior source moisture penetrating through weaknesses in roofing, siding, flashing etc or by interior source moisture in the form of condensation collecting on relatively cold surfaces inside the building and sometimes even within the structure itself. 

It is the second - the condensation process - that can be aggravated (though not caused) by improper placement of insulation and/or vapor barriers.  Usually though, in our climate, condensation is not the culprit in a moisture problem and I think I can suggest convincing evidence:  The most common example of condensation inside a house is when water collects on the inside of a window when it is cold outside and warm and humid inside.  For that to occur, two factors must coincide - the inside air must be at or above a certain humidity level and the surface of the glass in the window must cold enough to cause the indoor air that flows over it to cool rapidly.  That's called "reaching dew point" and you can imagine why you wouldn't want it to happen inside the walls of your house.

Now, here's my evidence in the form of a question:  How often have you witnessed this in Ocracoke?  Agreed, it can be common in bathrooms where the humidity is artificially pumped up by running a shower, but that's why bath fans are so important.  So besides bathroom windows, how often do you witness condensation on your windows?  Not often, I think.  And the reason is that there is rarely enough temperature differential between the indoor air and the outdoor air in our climate to cause the window glass to reach dew point on the inside surface.

So what does that mean?  It means that practically no matter how you design your walls and insulation in our climate, the key moisture issue is not going to be condensation.  That's why it's OK to use felt paper on an outside wall here, where in a cold climate that would spell Disaster (with a capital D) - as the felt paper would act much like window glass does when it reaches dew point.  So if we can eliminate condensation as a likely cause of moisture problems here, then why is rotted wood so common in our old (and even some new) Ocracoke houses?  I'll get there in my next post.